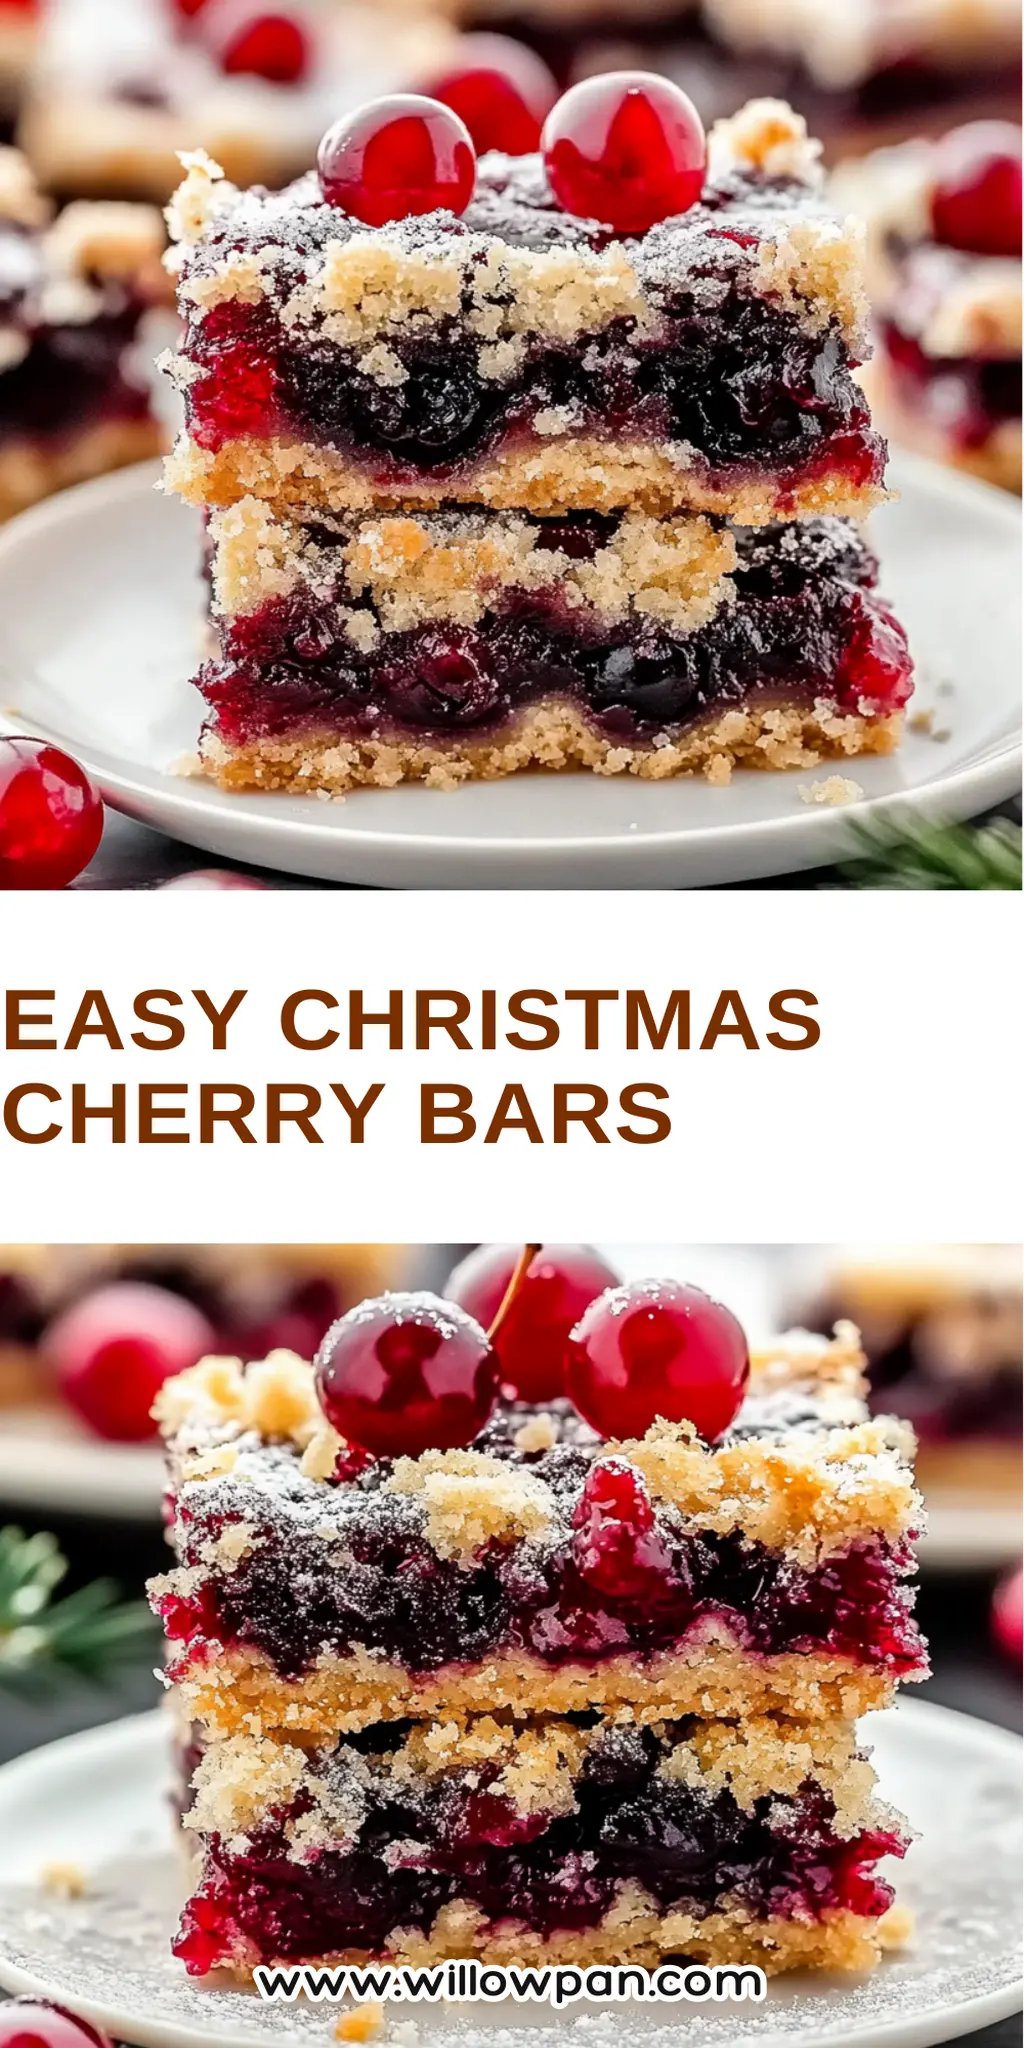
The holiday season is always buzzing with cheerful energy, and nothing embodies that festive spirit quite like the delightful aroma of baking wafting through your home. One chilly afternoon, as I sifted through my pantry, I stumbled upon a can of cherry pie filling that sparked an idea: why not create something sweet and celebratory? Thus, my Easy Christmas Cherry Bars were born!
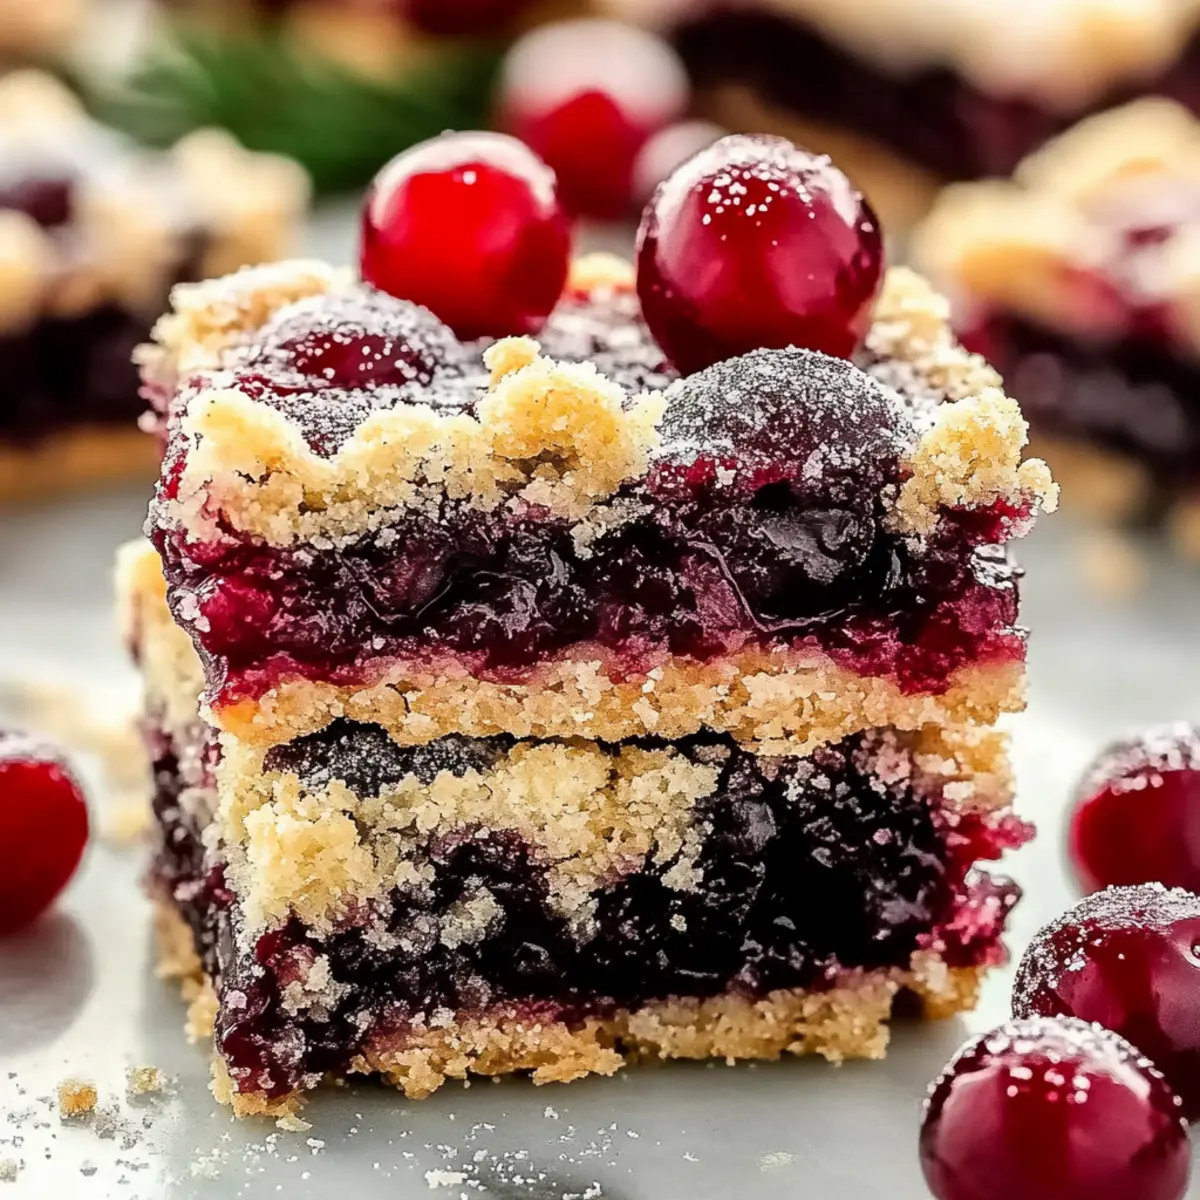
These bars are the perfect solution for anyone looking to add a touch of homemade magic to their dessert table without spending hours in the kitchen. With the buttery base and the vibrant cherry surprise, they’re a crowd-pleaser that will have your friends and family asking for seconds. Plus, whether you’re an experienced baker or just starting out, the simple steps mean you can whip up a batch in no time. So grab your mixing bowls, and let’s dive into this festive treat that captures the essence of Christmas in every delicious bite!
Why You'll Love This Easy Christmas Cherry Bars
- These Easy Christmas Cherry Bars are incredibly simple to make, allowing you to enjoy holiday baking without the hassle.
- The combination of buttery flavor and sweet cherry filling creates a dessert that will tantalize your taste buds and leave you wanting more.
- Their festive appearance makes them a beautiful addition to any holiday gathering, guaranteed to impress your guests.
- Plus, these bars are perfect for feeding a crowd, making them a go-to choice for parties and family celebrations.
- Enjoy the ease, flavor, and festive charm all in one delightful treat!
Easy Christmas Cherry Bars Ingredients
For the Batter
• 1 cup butter (softened) – This ensures a rich, creamy base that’s essential for texture.
• 2 cups sugar – Provides sweetness that balances the tartness of the cherry filling.
• 4 large eggs – Acts as a binding agent, giving structure to the bars.
• 1 tsp vanilla extract – Adds a warm undertone that complements the cherry flavor.
• 3 cups all-purpose flour – The essential base that gives the bars their delightful density.
• 1 tsp salt – Enhances the sweetness and balances the flavors.
For the Cherry Filling
• 1 can cherry pie filling (21 ounces) – The star of the show, providing a burst of fruity goodness.
For the Glaze
• 1 cup powdered sugar – Creates a sweet, luxurious finish to your Easy Christmas Cherry Bars.
• 2 tbsp milk – Adjusts the consistency of your glaze to the perfect drizzle.
• 1/2 tsp vanilla extract – A touch of flavor to elevate the glaze’s overall taste.
How to Make Easy Christmas Cherry Bars
-
Preheat your oven to 350°F (175°C). This step is crucial for baking the bars evenly and ensuring they achieve that golden-brown finish.
-
Cream together the softened butter and sugar in a mixing bowl until fluffy. This process usually takes about 3-4 minutes, resulting in a light and airy mixture that sets the foundation for your bars.
-
Add the eggs, one at a time, mixing well after each addition. This ensures your batter remains smooth and well integrated, giving the bars their lovely texture.
-
Stir in 1 tsp of vanilla extract. The aroma of vanilla adds a welcoming warmth to your batter that perfectly complements the cherry filling.
-
Combine the flour and salt in another bowl. This step ensures an even distribution of the salt, which enhances the flavors of your Easy Christmas Cherry Bars.
-
Gradually add the dry ingredients to the butter mixture. Mix until well combined; the batter should be thick and cohesive.
-
Spread half of the batter into a greased baking pan, ensuring you cover the bottom evenly. This forms the delicious base layer for those juicy cherries to rest on.
-
Spoon the cherry pie filling over the batter. Spread it out gently, allowing those cherries to be the star of the show.
-
Drop spoonfuls of the remaining batter on top of the cherry filling. This creates a beautiful, rustic look that will result in stunning bars once baked.
-
Bake for 40 minutes, or until the top is golden brown. The edges should slightly pull away from the pan, indicating that your bars are ready.
-
Allow to cool before glazing, letting the flavors settle and ensuring the glaze adheres perfectly.
-
For the Glaze: In a bowl, mix the powdered sugar, milk, and 1/2 tsp of vanilla extract until smooth. This should create a lovely, drizzling consistency that’s pure perfection.
-
Drizzle the glaze over the cooled bars. This final touch adds a sweet finish that ties everything together beautifully.
Optional: Top with festive sprinkles for an extra holiday touch!
Exact quantities are listed in the recipe card below.
What to Serve with Easy Christmas Cherry Bars?
The perfect holiday treat deserves a delightful spread that enhances its festive charm and flavor.
-
Vanilla Ice Cream: A scoop of creamy vanilla ice cream complements the sweet cherry bars, offering a delightful contrast in temperature and texture.
-
Whipped Cream: Adding a dollop of freshly whipped cream elevates the bars, making each bite richer and more luxurious. It’s the ultimate finishing touch for this sweet treat.
-
Coffee or Hot Cocoa: A warm beverage like coffee or hot cocoa pairs beautifully. The rich flavors balance the sweetness of the cherry bars, creating a cozy experience.
-
Cheese Platter: A selection of sharp or creamy cheeses introduces a savory note. Consider serving with some nuts to add crunch, creating a wonderful flavor spectrum.
-
Christmas Fruit Salad: A refreshing salad with citrus fruits or pomegranate seeds offers a bright, zesty counterpoint, enhancing the overall holiday mood.
-
Minty Sparkling Water: For a festive drink option, mint-infused sparkling water cleanses the palate while adding an aromatic element to the meal.
-
Chocolate-Dipped Pretzels: These add a delightful salty-sweet contrast that complements the berry flavors perfectly, making for an irresistible snack.
-
Nutty Granola: A sprinkle of homemade or store-bought granola adds crunch and gives a nutty flavor that marries well with the cherries.
-
Holiday Cookies: Pair these bars with traditional holiday cookies for a mixed dessert platter that will enchant all your guests, encouraging them to sample a little of everything!
How to Store and Freeze Easy Christmas Cherry Bars
Room Temperature: Allow cooled bars to sit at room temperature for up to 3 days in an airtight container to maintain freshness.
Fridge: For longer storage, keep the Easy Christmas Cherry Bars in the refrigerator where they will stay fresh for up to a week.
Freezer: To freeze, wrap individual bars in plastic wrap and then place them in a freezer-safe bag; they can be stored for up to 3 months.
Reheating: When reheating, place the thawed bars in a 350°F oven for about 10 minutes to restore their delightful texture and warmth.
Make Ahead Options
These Easy Christmas Cherry Bars are perfect for meal prep, saving you time during the busy holiday season! You can prepare the batter up to 24 hours in advance by mixing it completely and storing it in an airtight container in the refrigerator. Additionally, the cherry filling can be spooned over the batter and assembled in the baking pan, then covered tightly with plastic wrap and refrigerated for 3 days. When you’re ready to bake, simply pop the chilled pan in the oven, adding a few extra minutes to the cooking time if needed, and drizzle with glaze once cooled. Rest assured, your bars will be just as delicious and festive, making your holiday gatherings a breeze!
Easy Christmas Cherry Bars Variations
Get ready to sprinkle your own magic into these delightful bars with fun twists that will mesmerize your taste buds!
-
Almond Flavor: Substitute vanilla extract with almond extract for a nutty, aromatic twist that enhances the cherry flavor beautifully.
-
Gluten-Free: Use a gluten-free all-purpose flour blend to make these bars safe for gluten-sensitive friends without sacrificing taste or texture.
-
Chocolate Chips: Fold in 1 cup of chocolate chips into the batter for a luscious chocolate-cherry combination that’s perfect for indulgent moments.
-
Nutty Crunch: Add 1 cup of chopped nuts, like walnuts or pecans, for a delightful crunch that contrasts beautifully with the soft bars.
-
Cream Cheese Layer: Spread a layer of sweetened cream cheese on the base before adding the cherry filling for a rich, creamy addition that complements the cherries perfectly.
-
Coconut Topping: Sprinkle shredded coconut over the cherry pie filling for a tropical twist that brings a surprising flavor to every bite.
-
Spicy Kick: Add a dash of cayenne pepper or cinnamon to the batter for a playful and warming spice that will surprise your sense of taste.
-
Dairy-Free: Swap butter with coconut oil and use non-dairy milk in the glaze for a deliciously compassionate treat that doesn’t skimp on flavor.
Chef's Helpful Tips
- When making Easy Christmas Cherry Bars, ensure your butter is at room temperature for a smoother blending process.
- Avoid overmixing the batter after adding the flour to maintain a tender texture in the bars.
- When dropping spoonfuls of batter over the cherry filling, aim for an even distribution to allow for better baking and a nice presentation.
- Always check for doneness by looking for a golden-brown top and edges that pull away slightly from the pan, which typically takes around 40 minutes at 350°F.
Easy Christmas Cherry Bars Recipe FAQs
How do I select the best cherries for my Easy Christmas Cherry Bars?
Absolutely! For this recipe, you’ll want to use high-quality cherry pie filling. Look for a brand that has whole, firm cherries without excessive liquid. If using fresh cherries, ensure they’re ripe and sweet, firm to the touch, and free from dark spots.
What’s the best way to store Easy Christmas Cherry Bars?
To keep your Easy Christmas Cherry Bars fresh, allow them to cool completely, then store them in an airtight container at room temperature for up to 3 days. If you’re planning to enjoy them later, refrigerate them to extend freshness for up to 1 week.
Can I freeze Easy Christmas Cherry Bars, and how?
Yes, you can freeze them! To do this, wrap each bar in plastic wrap, then place them inside a freezer-safe bag or container. Make sure to label them with the date. They can be stored for up to 3 months. When you’re ready to enjoy, thaw in the fridge overnight and then reheat in a 350°F oven for about 10 minutes to restore their yummy texture!
What can I do if my bars come out too dry?
Very good question! If you find that your Easy Christmas Cherry Bars have turned out dry, next time try not to overmix your batter once the flour is added, as this can lead to a dense texture. Also, oven temperatures can vary, so using an oven thermometer can help ensure you’re baking at the right temperature. Lastly, check your bars a few minutes before the suggested time to prevent overbaking—look for a golden top and slightly pulled edges!
Are these bars suitable for those with allergies?
Great inquiry! The Easy Christmas Cherry Bars contain common allergens like eggs, butter, and gluten. If you’re making them for someone with dietary restrictions, consider substituting with dairy-free butter, egg replacer, and gluten-free flour blends. Always check your cherry filling for any added allergens if you’re using a canned variety!
Can I make these bars ahead of time for a party?
Absolutely! These bars can be made two or three days ahead of your gathering. Just store them properly in an airtight container in the fridge. Before serving, let them come to room temperature or warm them slightly for that fresh-out-of-the-oven delight, making your holiday gathering extra special!
Easy Christmas Cherry Bars
Ingredients
Equipment
Method
- Preheat your oven to 350°F (175°C). This step is crucial for baking the bars evenly and ensuring they achieve that golden-brown finish.
- Cream together the softened butter and sugar in a mixing bowl until fluffy. This process usually takes about 3-4 minutes.
- Add the eggs, one at a time, mixing well after each addition.
- Stir in 1 tsp of vanilla extract.
- Combine the flour and salt in another bowl.
- Gradually add the dry ingredients to the butter mixture. Mix until well combined.
- Spread half of the batter into a greased baking pan, ensuring you cover the bottom evenly.
- Spoon the cherry pie filling over the batter.
- Drop spoonfuls of the remaining batter on top of the cherry filling.
- Bake for 40 minutes, or until the top is golden brown.
- Allow to cool before glazing.
- In a bowl, mix the powdered sugar, milk, and 1/2 tsp of vanilla extract until smooth.
- Drizzle the glaze over the cooled bars.