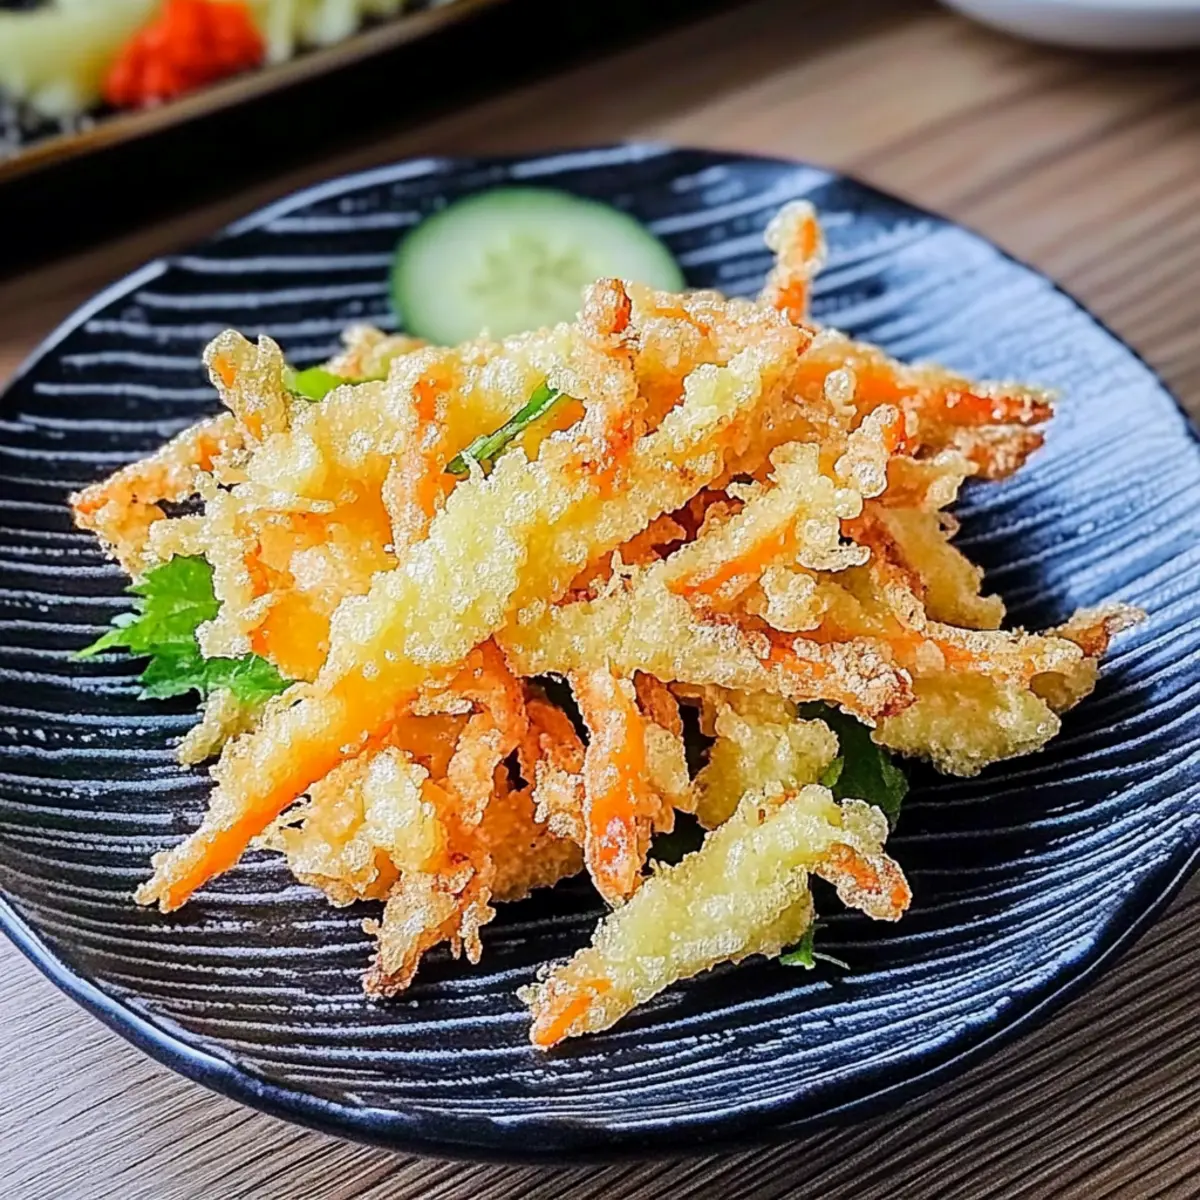
Imagine walking into your kitchen and being enveloped by the tantalizing aroma of crispy delights, whispering promises of crunch and flavor. That’s exactly what happens when you whip up a batch of Crispy Authentic Kakiage! This delightful Japanese dish transforms humble vegetables and shrimp into a golden, crispy treat that feels like a celebration with every bite.
You might think that such a delicious dish requires hours of intricate preparation, but you’d be pleasantly surprised. With a handful of fresh ingredients and just 36 minutes of your time, you can create a dish that’s not only visually stunning but also a guaranteed crowd-pleaser. Whether you’re hosting friends for dinner or simply treating yourself after a long day, Kakiage fits beautifully into any occasion.
Join me on this culinary adventure where we turn simple ingredients into a delightful snack or appetizer that beautifully bridges the gap between comfort food and gourmet cuisine!
Why You'll Love This Crispy Authentic Kakiage
- This recipe is incredibly easy to prepare, making it perfect for both novice and experienced cooks alike.
- The delightful combination of fresh vegetables and shrimp brings an explosion of flavor in every bite, satisfying even the pickiest eaters.
- Not only is it versatile enough to suit any occasion, but its stunning golden-brown appearance will impress your guests at any gathering.
- Plus, with a total time of just 36 minutes, it’s a fantastic time-saving option for weeknight meals or last-minute get-togethers.
Crispy Authentic Kakiage Ingredients
For the Batter
• Chilled water – Essential for achieving that light, crispy texture in the Kakiage.
• Chilled carbonated water – Adds a delightful fizz that enhances the crunch.
• Chilled cake flour – Creates a delicate batter; ensure it’s well-chilled for the best results.
• Chilled cornstarch – Works wonders for crispiness; don’t skip this key component!
• Large Egg – Binds the batter together for perfect adhesion.
• Ice cubes – Keeps the batter cold and contributes to that coveted crunch.
For the Filling
• Yellow onion – Sliced thinly to add sweetness and depth of flavor.
• Carrot – Julienne it for a touch of sweetness and vibrant color.
• Boiled shrimp – Adds a protein-packed punch; feel free to substitute with a different protein if desired.
• Green beans – Halved to balance the flavors and textures beautifully.
For Dusting and Serving
• Cake flour – A light dusting helps the vegetables and shrimp stick to the batter better.
• Sea salt (optional) – A sprinkle before serving enhances the overall flavor.
• Diluted tsuyu sauce (optional) – Provides a savory dip that elevates your Kakiage experience.
With these Crispy Authentic Kakiage ingredients, you’re ready to embark on a culinary journey that will amaze your taste buds!

How to Make Crispy Authentic Kakiage
-
Prepare a large bowl by combining the chilled water and carbonated water. This frothy mix is essential for that glorious crunch you’ll love in Kakiage.
-
Mix the chilled cake flour and cornstarch in a separate bowl. This blend creates a delicate, crispy coating that will envelop your vegetables and shrimp perfectly.
-
Combine the egg and ice cubes into the water mixture, then gradually introduce the flour and cornstarch mixture. Stir until just combined—don’t overmix; we want airy batter!
-
Slice the yellow onion thinly, julienne the carrot, cut the boiled shrimp into bite-sized pieces, and halve the green beans. These colorful veggies will add both flavor and flair to your Kakiage.
-
Dust the prepared vegetables and shrimp lightly with the additional cake flour. This will help them adhere to the batter and achieve that delectable crunch you crave.
-
Heat oil in a deep pan to about 350°F (175°C) for frying. The right temperature is crucial for achieving that golden-brown perfection.
-
Drop the coated vegetables and shrimp into the batter, then gently place them into the hot oil. Fry them in small batches to ensure they cook evenly.
-
Fry until golden brown and crispy, about 2-3 minutes for each batch. You’ll know they’re ready when they’re a delightful golden hue and have that irresistible crunch.
-
Remove the Kakiage from the oil and drain them on paper towels. A sprinkle of sea salt will elevate the flavors so don’t be shy!
-
Serve immediately with diluted tsuyu sauce on the side for dipping. This enhances your Kakiage and adds a delightful umami flavor!
Optional: Garnish with sliced scallions for a touch of freshness.
Exact quantities are listed in the recipe card below.
Make Ahead Options
These Crispy Authentic Kakiage are perfect for busy weeknights or meal prepping enthusiasts! You can chop and prep the vegetables and boiled shrimp up to 24 hours in advance, storing them in an airtight container in the refrigerator to maintain their freshness. Additionally, you can mix the batter (water, egg, flour, cornstarch, and ice) up to 3 hours ahead, keeping it chilled until you’re ready to fry. When it’s time to serve, simply dust the vegetables and shrimp with the additional cake flour, heat the oil, and fry until golden and crispy. This way, you’ll enjoy delicious, homemade Kakiage with minimal effort and maximum flavor!
Crispy Authentic Kakiage Variations
Feel free to put your own twist on this delightful recipe for even more amazing flavor and texture!
-
Vegetable Medley: Swap in veggies like zucchini or bell peppers for a colorful twist that brightens up each bite. Their varied textures will add depth to your Kakiage experience.
-
Gluten-Free: Use a gluten-free flour blend instead of cake flour for a fabulous gluten-free version, ensuring everyone can enjoy this crispy delight without compromise.
-
Spicy Kick: Add a pinch of cayenne pepper to the batter or toss in some sliced jalapeños with the filling for a delightful heat that complements the savory flavors perfectly.
-
Savory Twist: Stir in finely chopped herbs like green onions or cilantro into the batter for an added layer of freshness that elevates your Kakiage to gourmet.
-
Sweet Potato Addition: Incorporate sweet potato matchsticks into the mix for a subtly sweet flavor that contrasts beautifully with the savory shrimp and veggies.
-
Crunchy Toppings: Before frying, sprinkle some sesame seeds over the batter for an additional nutty crunch that will have everyone coming back for more.
-
Protein Swap: Consider swapping shrimp for pieces of cooked chicken or tofu, creating a deliciously different take while keeping all that wonderful crispiness.
-
Zesty Twist: A dash of lemon zest in the batter can brighten up the flavors, making each bite feel vibrant and refreshing.
How to Store and Freeze Crispy Authentic Kakiage
Room Temperature: Enjoy your Kakiage fresh for the best taste. If left out, consume within 2 hours to maintain quality and safety.
Fridge: Store any leftovers in an airtight container for up to 3 days. To maintain crunchiness, reheat in an oven rather than the microwave.
Freezer: Freeze cooled Kakiage in a single layer on a baking sheet, then transfer to a sealed bag for up to 2 months. Reheat directly from frozen for a crispy treat!
Reheating: For best results, reheat Kakiage in a preheated oven at 375°F (190°C) for about 10 minutes, ensuring they regain their delightful crunch.
What to Serve with Crispy Authentic Kakiage?
Elevate your Kakiage experience with these delightful pairings that balance flavors and textures beautifully.
-
Steamed Rice: The simplicity of steamed rice allows the crispy delight of Kakiage to shine, providing a comforting base.
-
Pickled Vegetables: A tangy side of pickled veggies brings a refreshing crunch that complements the savory Kakiage perfectly.
-
Miso Soup: Enjoying a warm bowl of miso soup creates a cozy dining experience, its umami flavors enhancing the lightness of the Kakiage.
-
Sesame Slaw: A crisp sesame slaw packed with textures offers a lovely contrast and a hint of nuttiness that pairs wonderfully with the dish.
-
Sautéed Greens: Tender sautéed greens with a touch of garlic lend a healthy balance, brightening the meal and adding vibrancy.
-
Sake or Green Tea: A chilled sake elevates the dining experience, while soothing green tea provides a calm complement to the meal.
Transform your Kakiage meal into an unforgettable feast!
Chef's Helpful Tips
- To achieve a super crispy texture in your Crispy Authentic Kakiage, ensure all your ingredients are well-chilled, as this keeps the batter light and airy.
- Common mistakes include overmixing the batter; remember, you want it just combined to avoid a dense coating.
- When slicing your vegetables, aim for even sizes to ensure uniform cooking, preventing some from becoming mushy while others remain raw.
- Ensure your oil is at the right temperature of about 350°F (175°C) to achieve that perfect golden-brown color in each batch without absorbing too much oil.
Crispy Authentic Kakiage Recipe FAQs
What type of vegetables work best for Kakiage?
Absolutely! While this recipe highlights yellow onion, carrot, shrimp, and green beans, you can get creative! Consider using zucchini, sweet potato, or even bell peppers for different flavor profiles. Just ensure they’re sliced or julienned so they cook evenly.
How should I store leftover Kakiage?
Very simply! For optimal freshness, store any leftovers in an airtight container in the fridge for up to 3 days. Remember, these crispy delights taste best when enjoyed fresh, so I recommend reheating them in the oven rather than the microwave to keep that lovely crunch.
Can I freeze Kakiage for later?
Yes, you absolutely can! After frying, allow the Kakiage to cool completely. Arrange them in a single layer on a baking sheet and place in the freezer for about an hour. Once frozen, transfer to a sealed freezer bag. They can be stored for up to 2 months. When you’re ready to enjoy, reheat directly from frozen in a preheated oven at 375°F (190°C) for about 10 minutes.
What if my batter isn’t crispy?
If your Kakiage isn’t achieving that desired crunch, there are a couple of things you can check! First, make sure all your ingredients, especially the water and flour, are chilled. Warm ingredients will lead to a denser batter. Also, ensure your oil is at the right temperature of about 350°F (175°C). If the oil is too cold, the batter will absorb more oil, leading to sogginess.
Are there any dietary considerations I should be aware of?
Absolutely! If you’re cooking for guests with allergies, be cautious. This recipe contains eggs and shrimp, which can be common allergens. For a vegetarian or vegan version, feel free to replace the shrimp with extra vegetables and substitute the egg with a flaxseed substitute (1 tablespoon of ground flaxseed mixed with 2.5 tablespoons of water).
Can I modify the seasoning for Kakiage?
Yes, indeed! If you’d like to add a twist to your Kakiage, consider mixing in some spices into the batter, such as garlic powder or even a pinch of cayenne for a heat kick! Just remember, any added ingredients might require a bit of adjustment in the amount of water for the batter, so keep that in mind while preparing.
Crispy Authentic Kakiage
Ingredients
Equipment
Method
- Prepare a large bowl by combining the chilled water and carbonated water.
- Mix the chilled cake flour and cornstarch in a separate bowl.
- Combine the egg and ice cubes into the water mixture, then gradually introduce the flour and cornstarch mixture.
- Slice the yellow onion thinly, julienne the carrot, cut the boiled shrimp into bite-sized pieces, and halve the green beans.
- Dust the prepared vegetables and shrimp lightly with the additional cake flour.
- Heat oil in a deep pan to about 350°F (175°C) for frying.
- Drop the coated vegetables and shrimp into the batter, then gently place them into the hot oil.
- Fry until golden brown and crispy, about 2-3 minutes for each batch.
- Remove the Kakiage from the oil and drain them on paper towels.
- Serve immediately with diluted tsuyu sauce on the side for dipping.


